
Update: A modder on the Nexus pointed out this handy TES5Edit script that automates the merging process, and even allows you to carry over the navmeshes from old plugins.
Introduction
OK. So let's clarify my example. We have two .esps - Mod A.esp is my mod. It adds a new, large quest to the game. But I'm terrible at level design, so I asked somebody on the Nexus to make a cave for me. And they did, because they're an awesome person. So now I have Mod A.esp, and Mod B.esp, which includes the cave. So I want to merge the two of them so Mod A.esp can use the cave from Mod B.esp, without requiring Mod B.esp as a master to function. This process is fairly simple, but it will require TES5Edit. Don't worry if you don't know how to use it - I'll explain it step by step so you shouldn't mess anything up.
One should note that you can't merge files lower in the load order with ones higher in the load order, so you'll have to move around the load order to merge them if you want to merge the lower mod with the higher one. You can always change the load order back later.
The Process
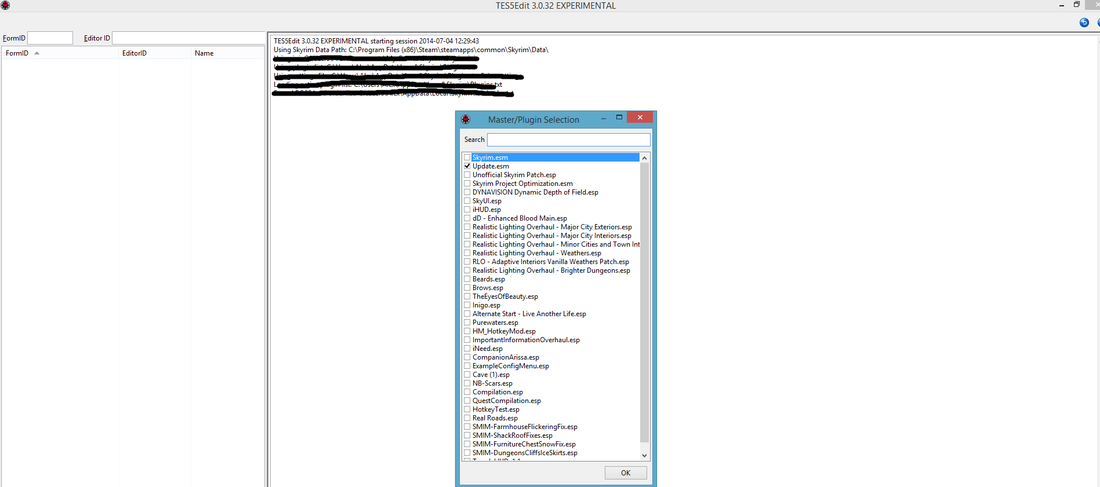
- Double click TES5Edit.exe. It should open up with a screen somewhat like the picture shown to the right (above on mobile). It's alright if all the boxes next to your mods are checked, if only some are, or if none are.
- Right click the list and select "Select None". This will make sure none of the boxes are checked, so we don't have to go through the entire list and deselect each one we don't want to load.
- Left click the checkbox next to the two mods you're merging, as well as their masters. Usually, the masters will be Skyrim.esm and Update.esm.
- Once you've selected the appropriate boxes, click the OK button at the bottom of the list. TES5Edit will begin to load. Give it some time, since it may take a little while.
- Once TES5Edit has loaded, select the mod you want to merge into your mod. This is the "target mod". In my case, Mod B.esp is the "target mod" because I want to merge it into my mod, not the other way around. Before we merge the .esps, I recommend automatically cleaning the target mod (clean your target mod the same way Gopher cleaned the masters) at the very least, if not manually.
- Now, once you've cleaned the target mod, select it's .esp. Now, find the category, subcategory, or record that you want to merge, and right click it and select "Deep Copy as Override"*. I'm going to merge the entire Cell category, because I want all the parts of the cell Mod B.esp added.
- A screen should pop up telling you you're about to edit a module file. Wait a few seconds, and when it allows you to, select "Yes, I'm absolutely sure." (TES5Edit will create backups of the mods you edited when it's closed, so you can always revert to those if somehow this messes up your .esp.)
- In the next screen, choose the mod you want to merge the "target mod" with. I'll choose Mod A.esp. Select yes when it asks you if you want to add the master. Don't worry, we'll remove this later.
- Repeat steps 7-9 until you've merged all the records you want into your mod.
TES5Edit Master Removal
- Now, to remove the master we just added, click on the file header of Mod A.esp (the non-target mod). Right click on the name of the master you don't want in the right hand window, and select remove. Click through any warnings. Now close TES5Edit and save any changes you made to Mod A.esp and Mod B.esp. You're done.
Creation Kit Master Removal
- If for any reason that doesn't work for you, or you'd prefer not to use TES5Edit to remove the master, then close TES5Edit and save your changes to Mod A.esp and Mod B.esp. Open up the CK.
- Once the CK loads, select the folder icon in the top left. Load Mod A.esp as the active file and its masters, including Mod B.esp. Once it's loaded, select the folder in the top left again.
- Highlight Mod A.esp in the window that comes up. To the right, you should see its masters, with Mod B.esp listed as one of them. Select Mod B.esp in the masters list, and press Ctrl + Delete. It should delete the master. Click Yes to All for any warnings. Save Mod A.esp and you're done.
I hope this was helpful for some people. If you found the instructions difficult to follow, please say so in the comments below and I'll try to make them clearer.
 RSS Feed
